
You can easily create a staff directory custom collection, in three simple steps:
The trick is to follow the steps carefully and exactly.
Go to Settings -> Collection Builder, and add a custom collection.
Note: it is important that you use these exact field types and names so that the import and the code below will function properly.
Name the directory "Staff Directory"
Add the following fields:
| Type: | Name: | Notes: |
| Image | Image | |
| Name | Name | |
| Short Answer | Title | |
| Phone | Phone | |
| *Dropdown | Category | Include options. For example: Pastoral Staff Ministry Staff Support Staff |
| Paragraph | Description |
*The Dropdown field type options can be adapted to your specific needs. The categories can be anything you want them to be. You may have only one, or many, and if you discover you need to add to the option list, you may edit it as needed.
*Dropdown field Note 1: All collection entries need a Category option to be included in the list.
*Dropdown field Note 2: Only one category can be applied to a single collection entry.
*Dropdown field Note 3: If a Category option is not applied to any collection entries, that Category title will still display.
Before you save the form, you'll need to enter some data into the "Settings" tab:
Now, you can save the custom collection by clicking the blue 'Save' button, on the bottom right.
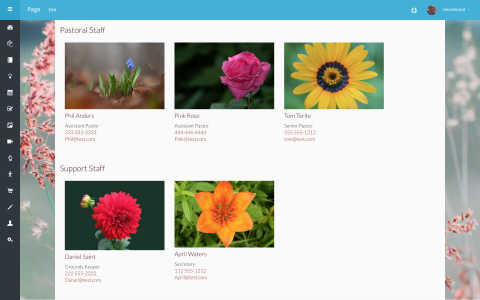
Notice that you will now see this custom collection in the black Admin sidebar. Find the new option and select it (click it) to go to the collection.
As you saw with the examples of the fields above, you will need a photo and some data about each person to be in the Staff Collection. Add a few entries using the "Add Staff" option at the top right. Add several people to your collection.
Now you can decide where you want the Directory page to be. You can navigate to the parent page, and then click "Create" to make a new child page at that location.